👨💻 Managing API integrations V
Introduction: API Integrations in Eversend
API integrations in Eversend allow you to seamlessly connect your domain registrars, server providers, and Cloudflare accounts to the platform, giving you centralized control over your infrastructure. By integrating these services, you can automate and streamline critical tasks like buying domains, managing servers, and setting up DNS configurations—all without leaving the Eversend environment.
With API integrations, you can manage your entire infrastructure efficiently, using a single interface to handle everything from bulk domain purchases to linking servers and Cloudflare for security. This connectivity simplifies your workflow and ensures that resources are always aligned with your campaign needs, providing you with more control, flexibility, and speed in managing your marketing infrastructure.
In this article, we’ll explore how to manage API integrations in Eversend, and how these integrations help optimize your campaigns.
Understanding the API integrations table in Eversend
Once you’ve added accounts to Eversend, you can manage them either in bulk through the API Integrations Table or individually by opening each account to view, edit, or manage its details.
To shortly describe the table of API integrations here are the details:
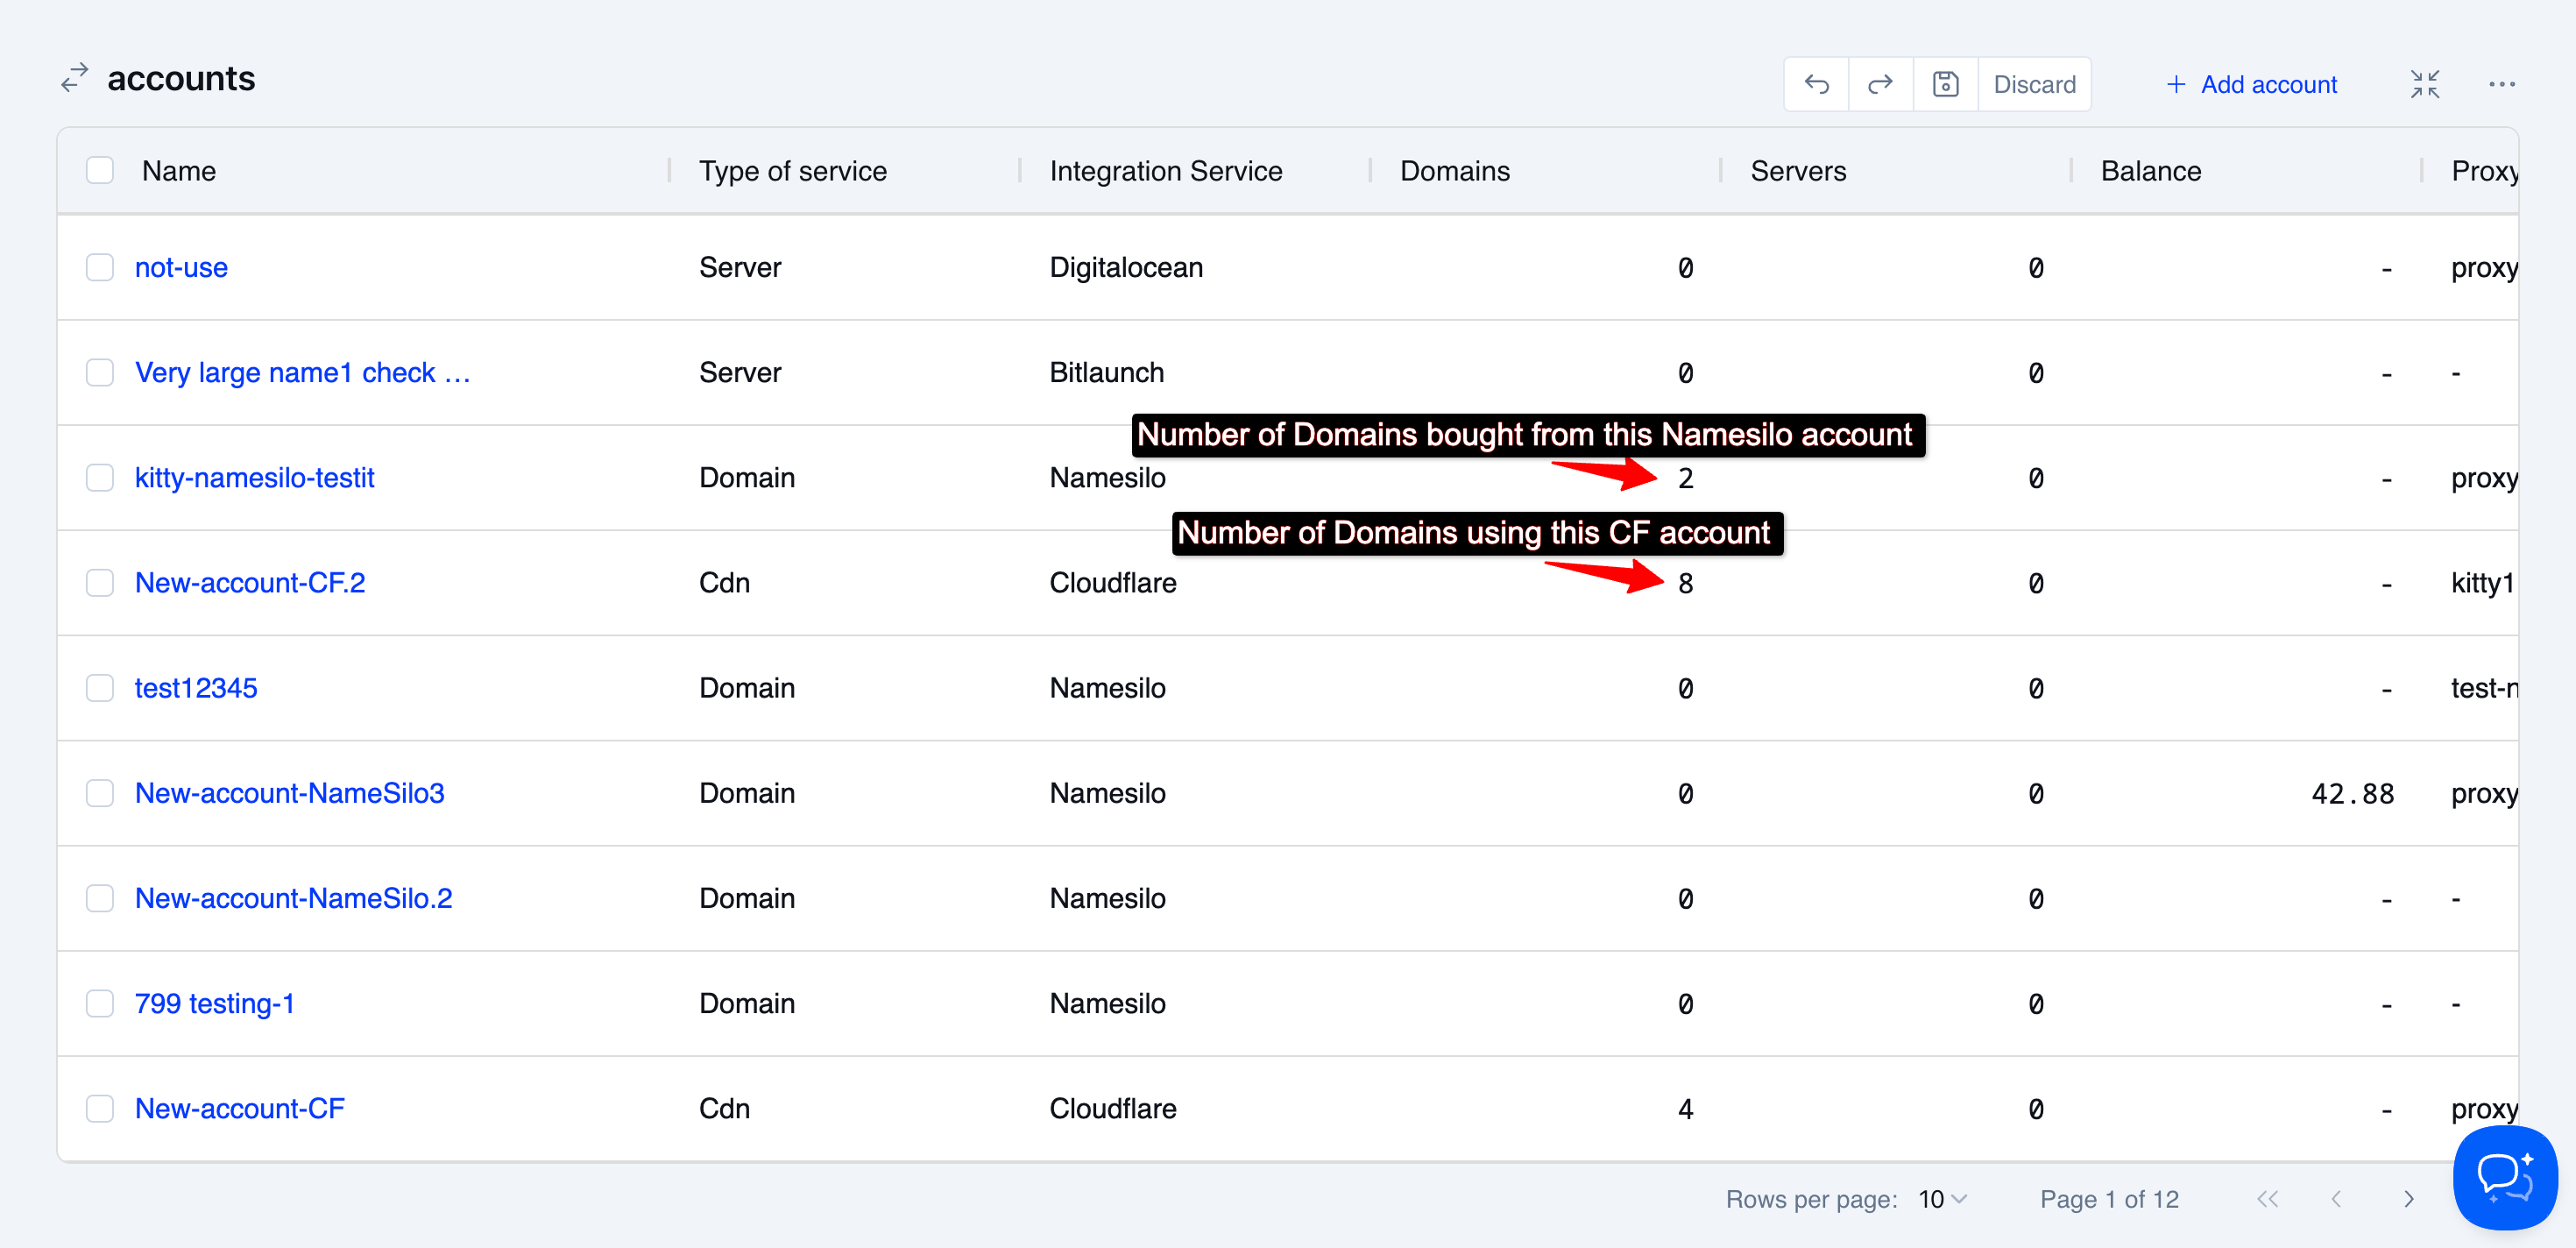
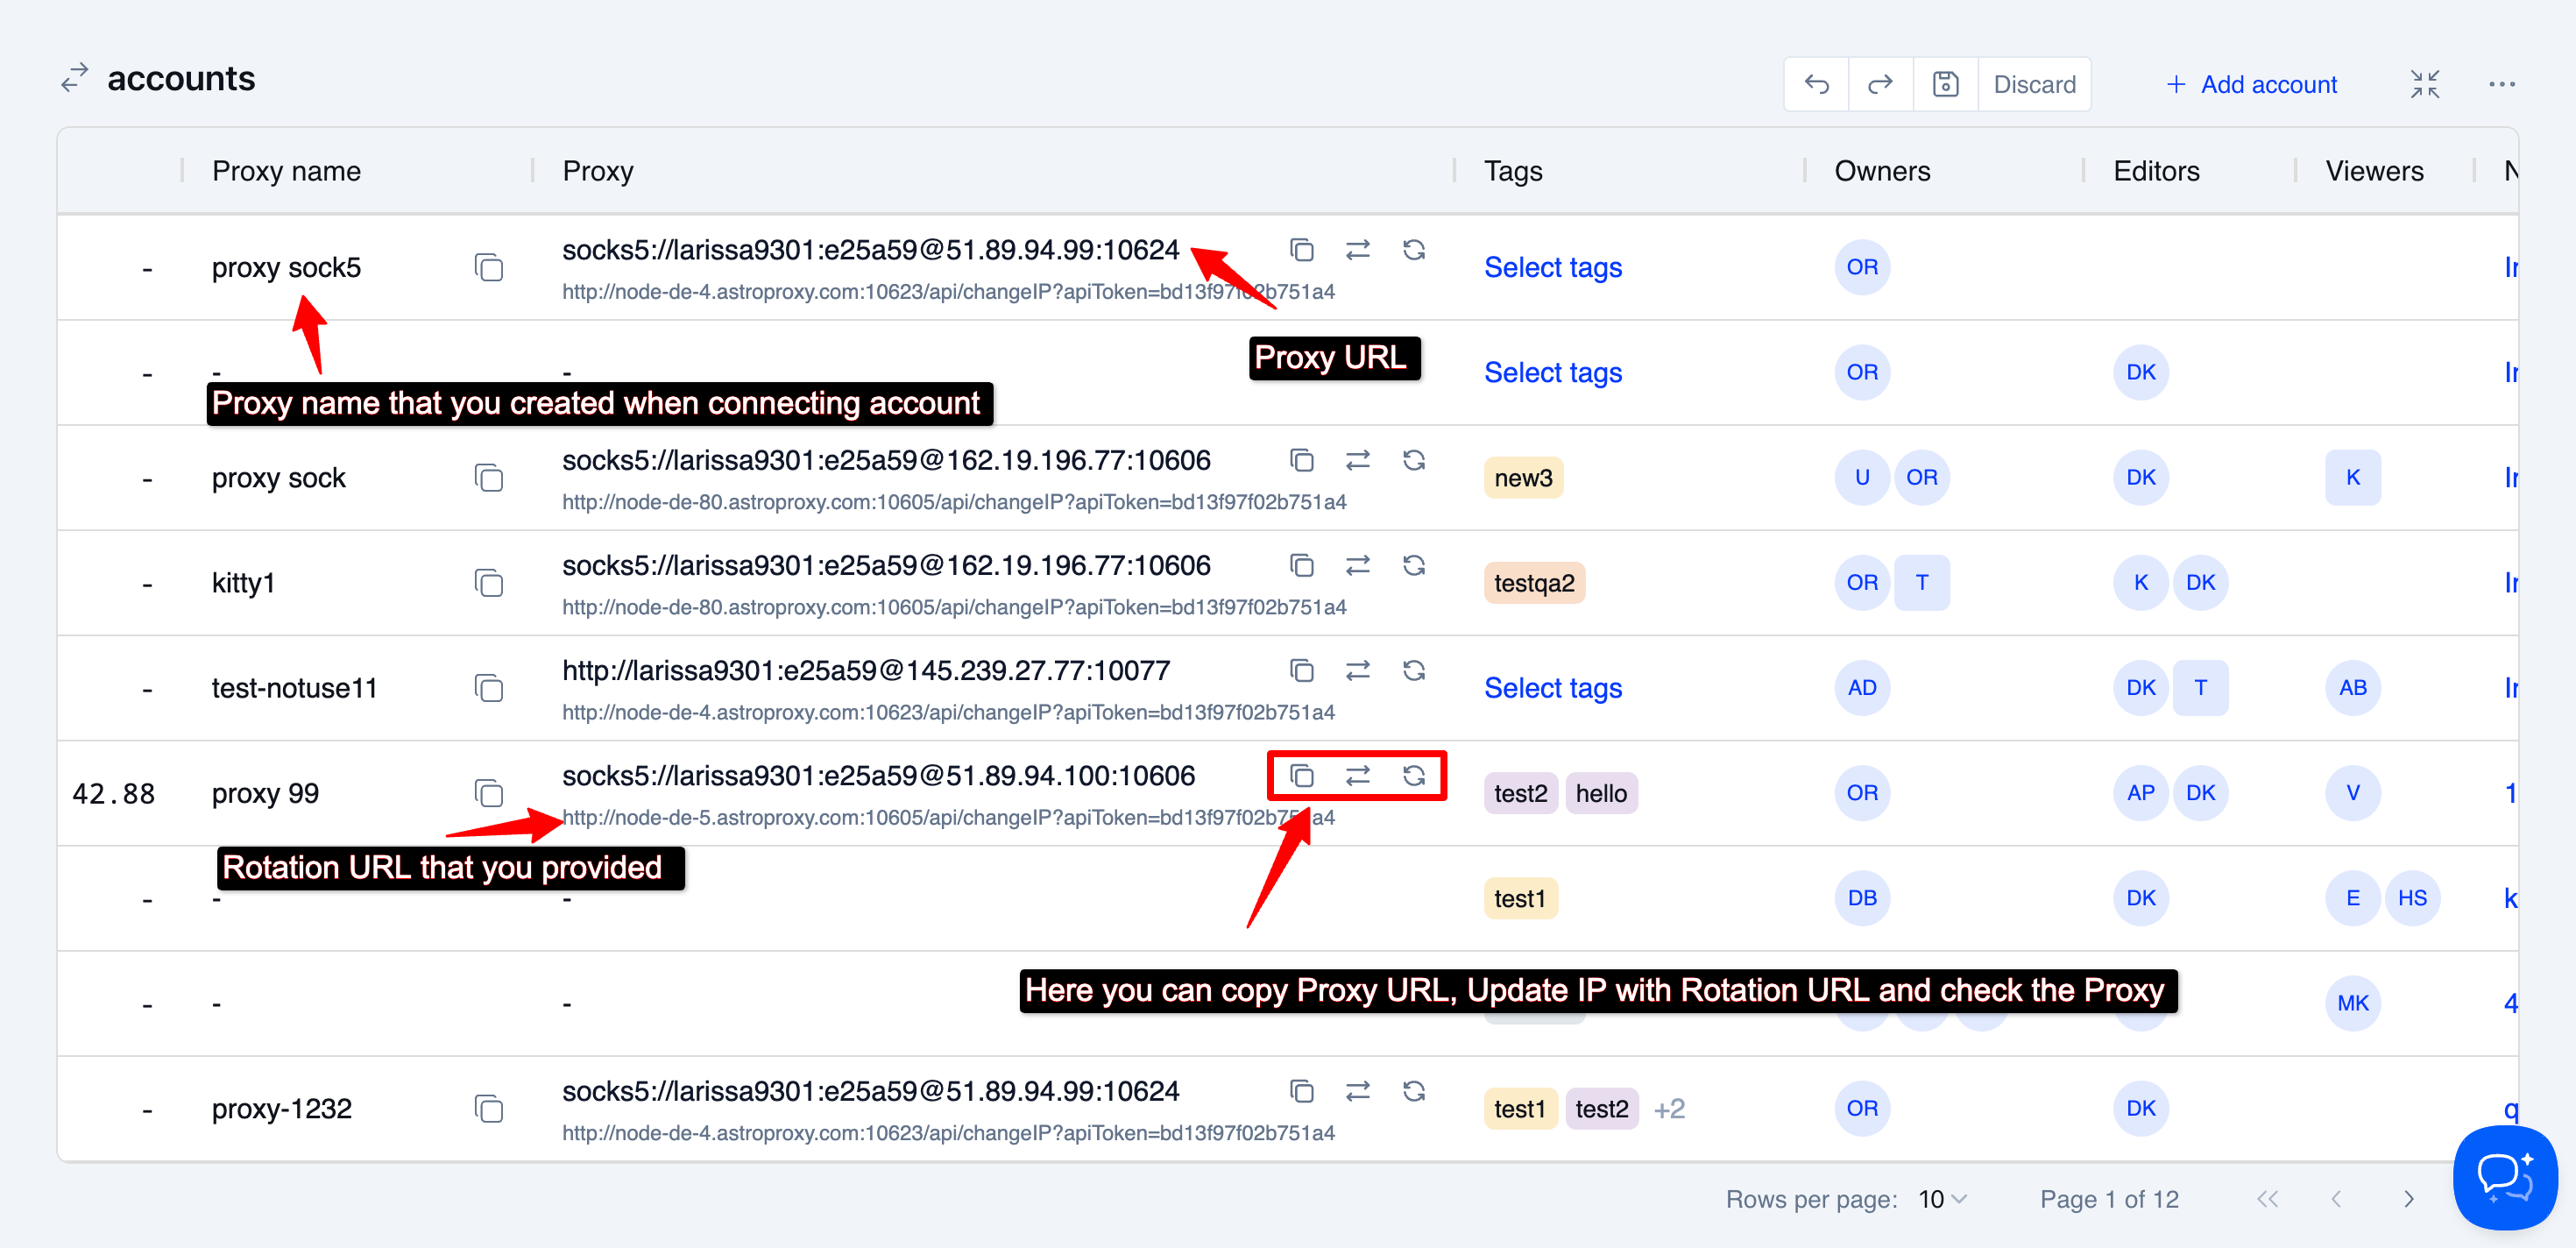
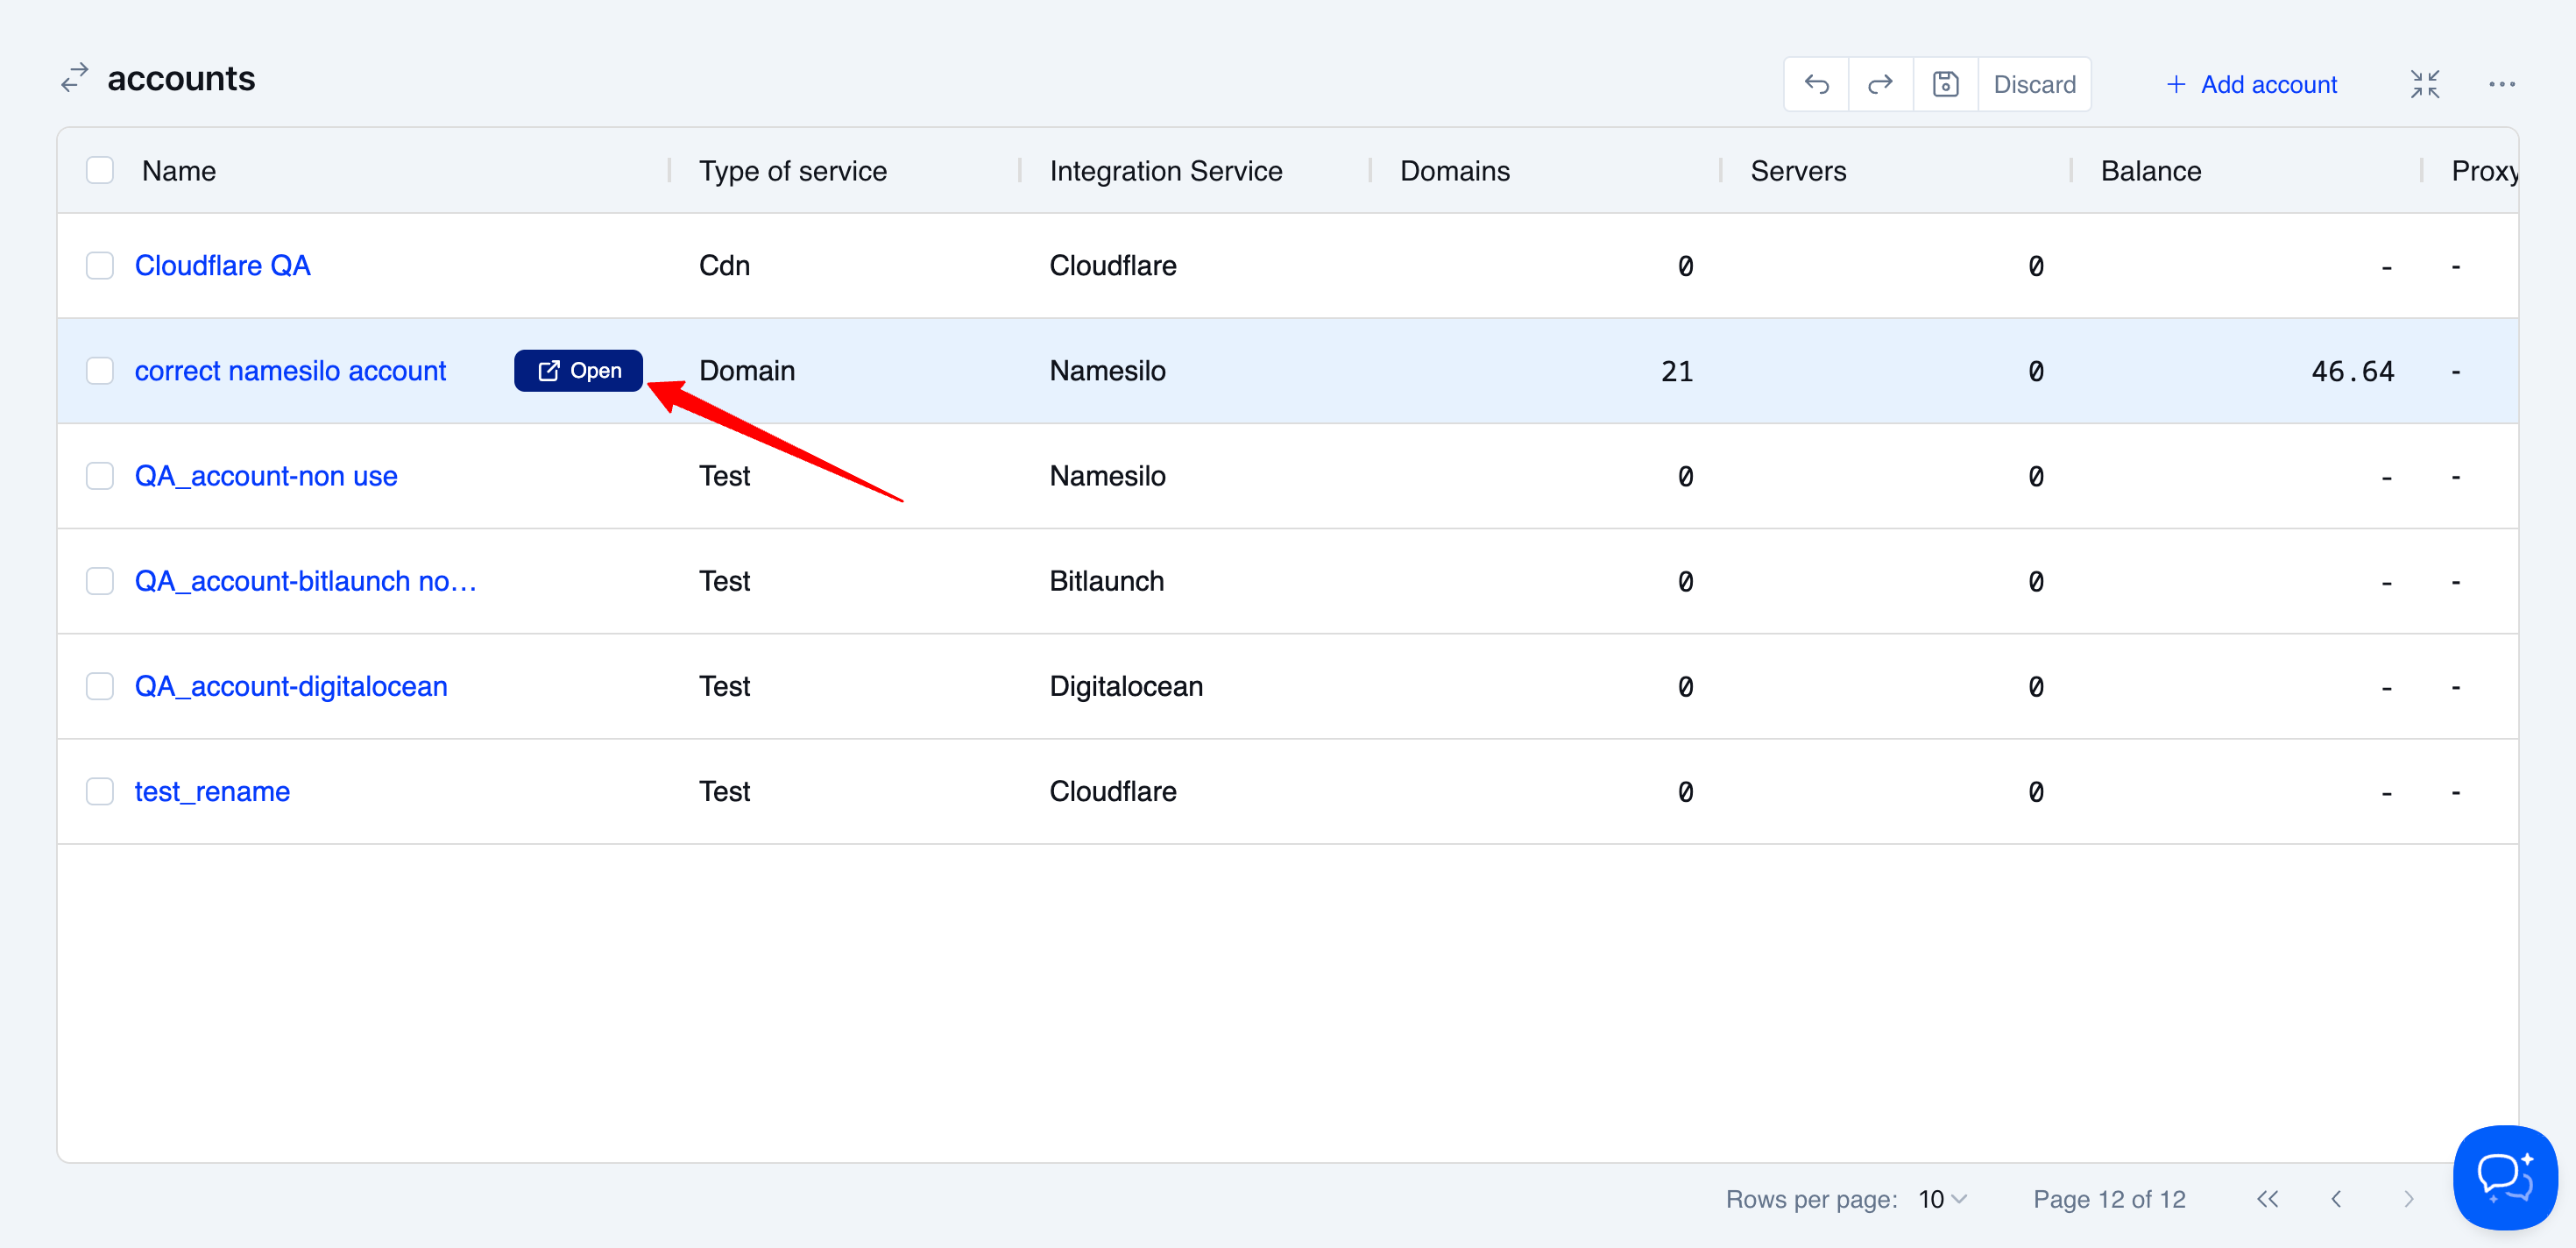
- Name: This is the account name you created when connecting your account to Eversend.
- Type of Service: Displays one of the three categories—Server Provider, Domain Registrar, or CDN (Cloudflare).
- Integration Service: The specific service you’ve connected, such as Namesilo, BitLaunch, or Cloudflare.
- Domains and Servers: These columns show the number of domains or servers purchased using this account.
- For Cloudflare accounts, the Domains column reflects the number of domains connected to this Cloudflare account.
Proxy
In the table, you’ll find the information you provided when connecting your account to Eversend. Additionally, there are three action buttons available for managing proxies:
- Copy Proxy URL: Allows you to copy the static proxy URL (not the rotation URL) for use elsewhere.
- Rotate Proxy: If a rotation URL was provided, this button lets you rotate the proxy, switching to a new IP address manually.
- During API requests, IP address is always rotated automatically at each request.
- Check Proxy: Sends a request to the proxy URL to verify if it’s functioning correctly.
Tags
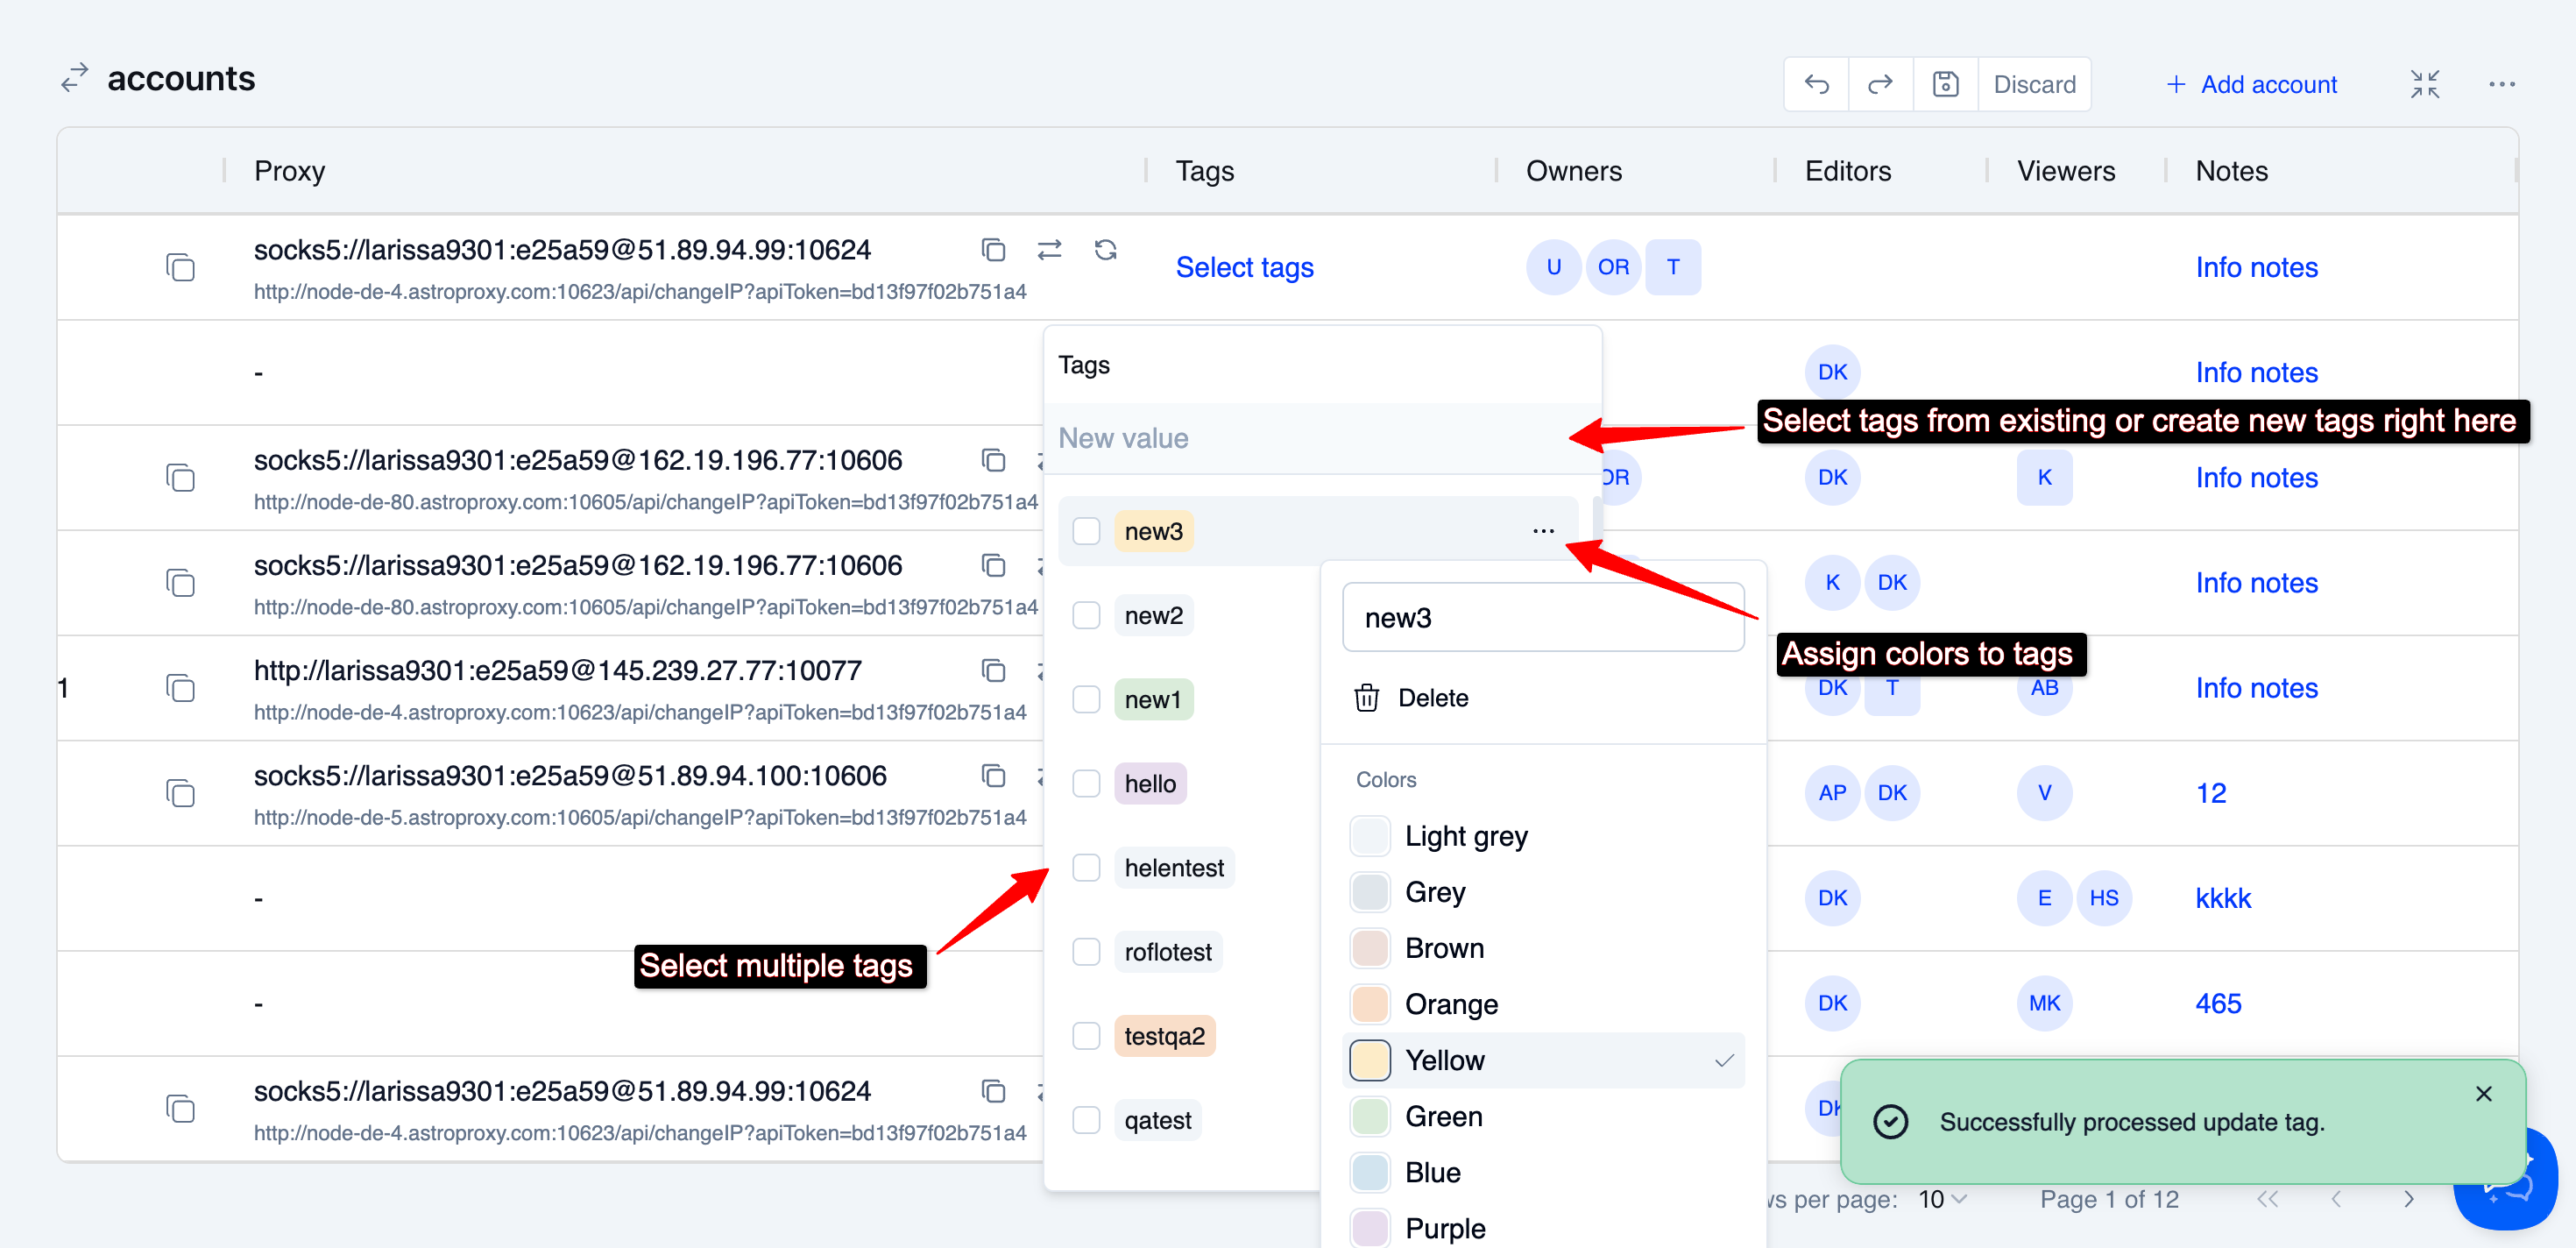
You can assign tags to your accounts to help categorize them for specific purposes, teams, or workflows. Tags make it easy to organize and manage your accounts more efficiently.
- Select multiple tags: You can apply several tags to an account at once.
- Create new tags: Add new tags directly from the interface as needed.
- Assign colors to tags: Use the context menu to assign colors to existing tags, making it even easier to identify and organize your accounts.
Permissions
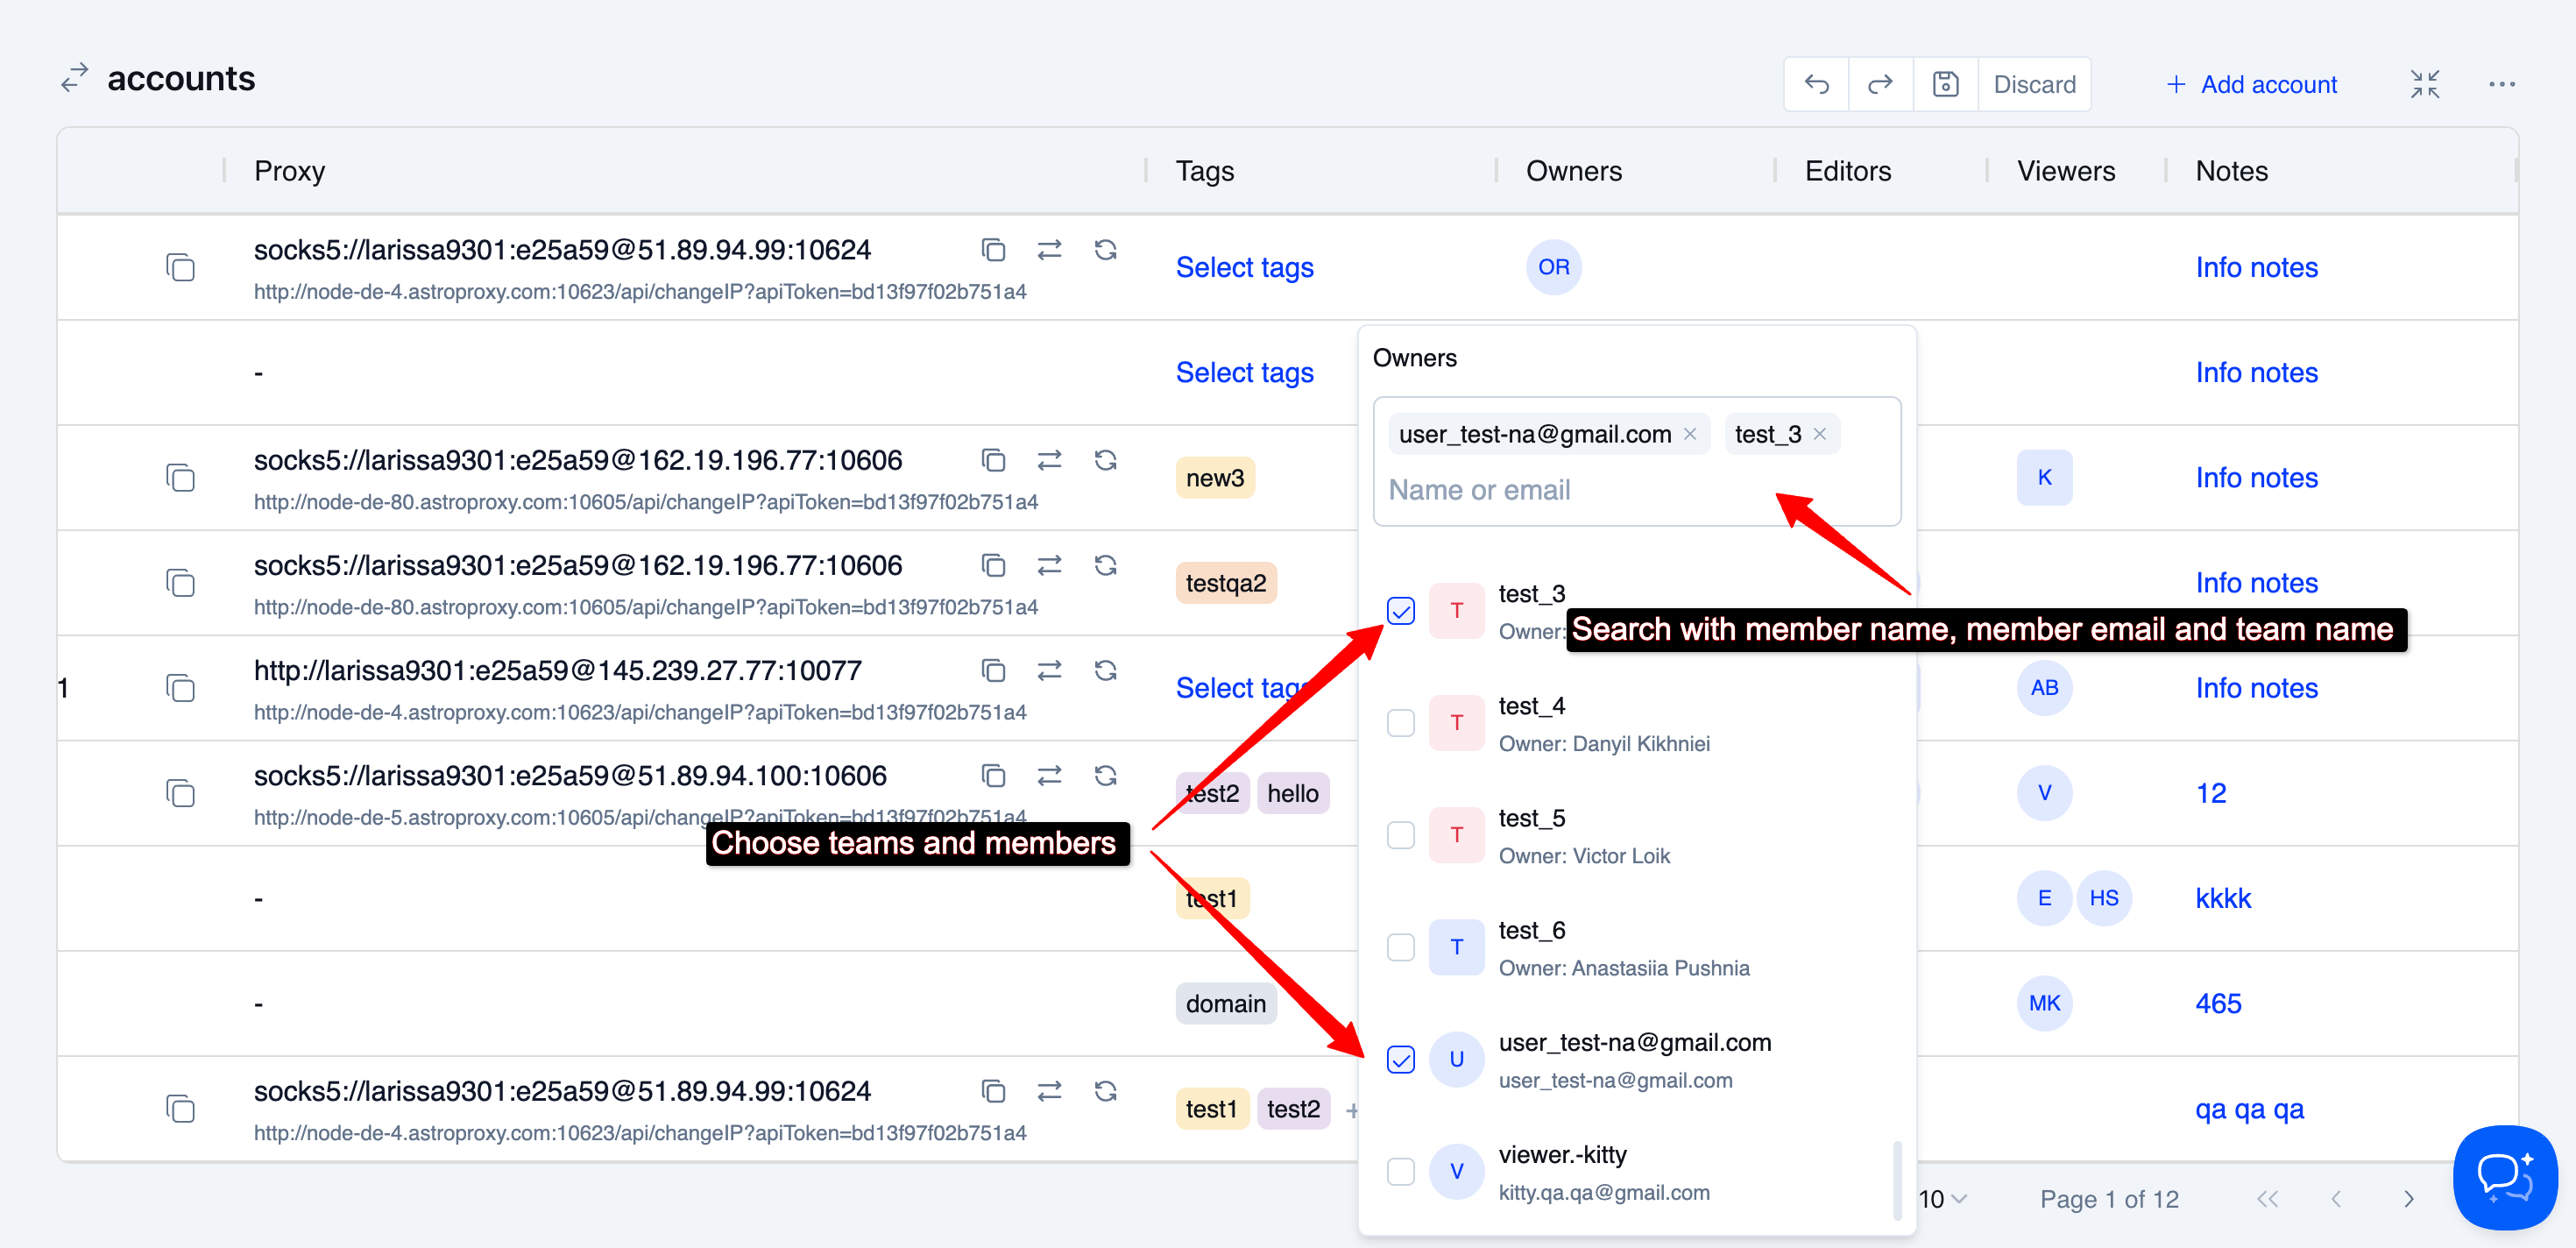
You can assign Owners, Editors, and Viewers to resources based on your own permissions. This allows you to delegate control and access to other team members:
- Owners: Can manage the account, including editing details, assigning all permissions and deleting the account.
- Editors: Have the ability to edit account data but cannot assign ownership or delete the account.
- Viewers: Can only view the account information and use it for tasks like purchasing domains, servers, or hosting domains, without making changes.
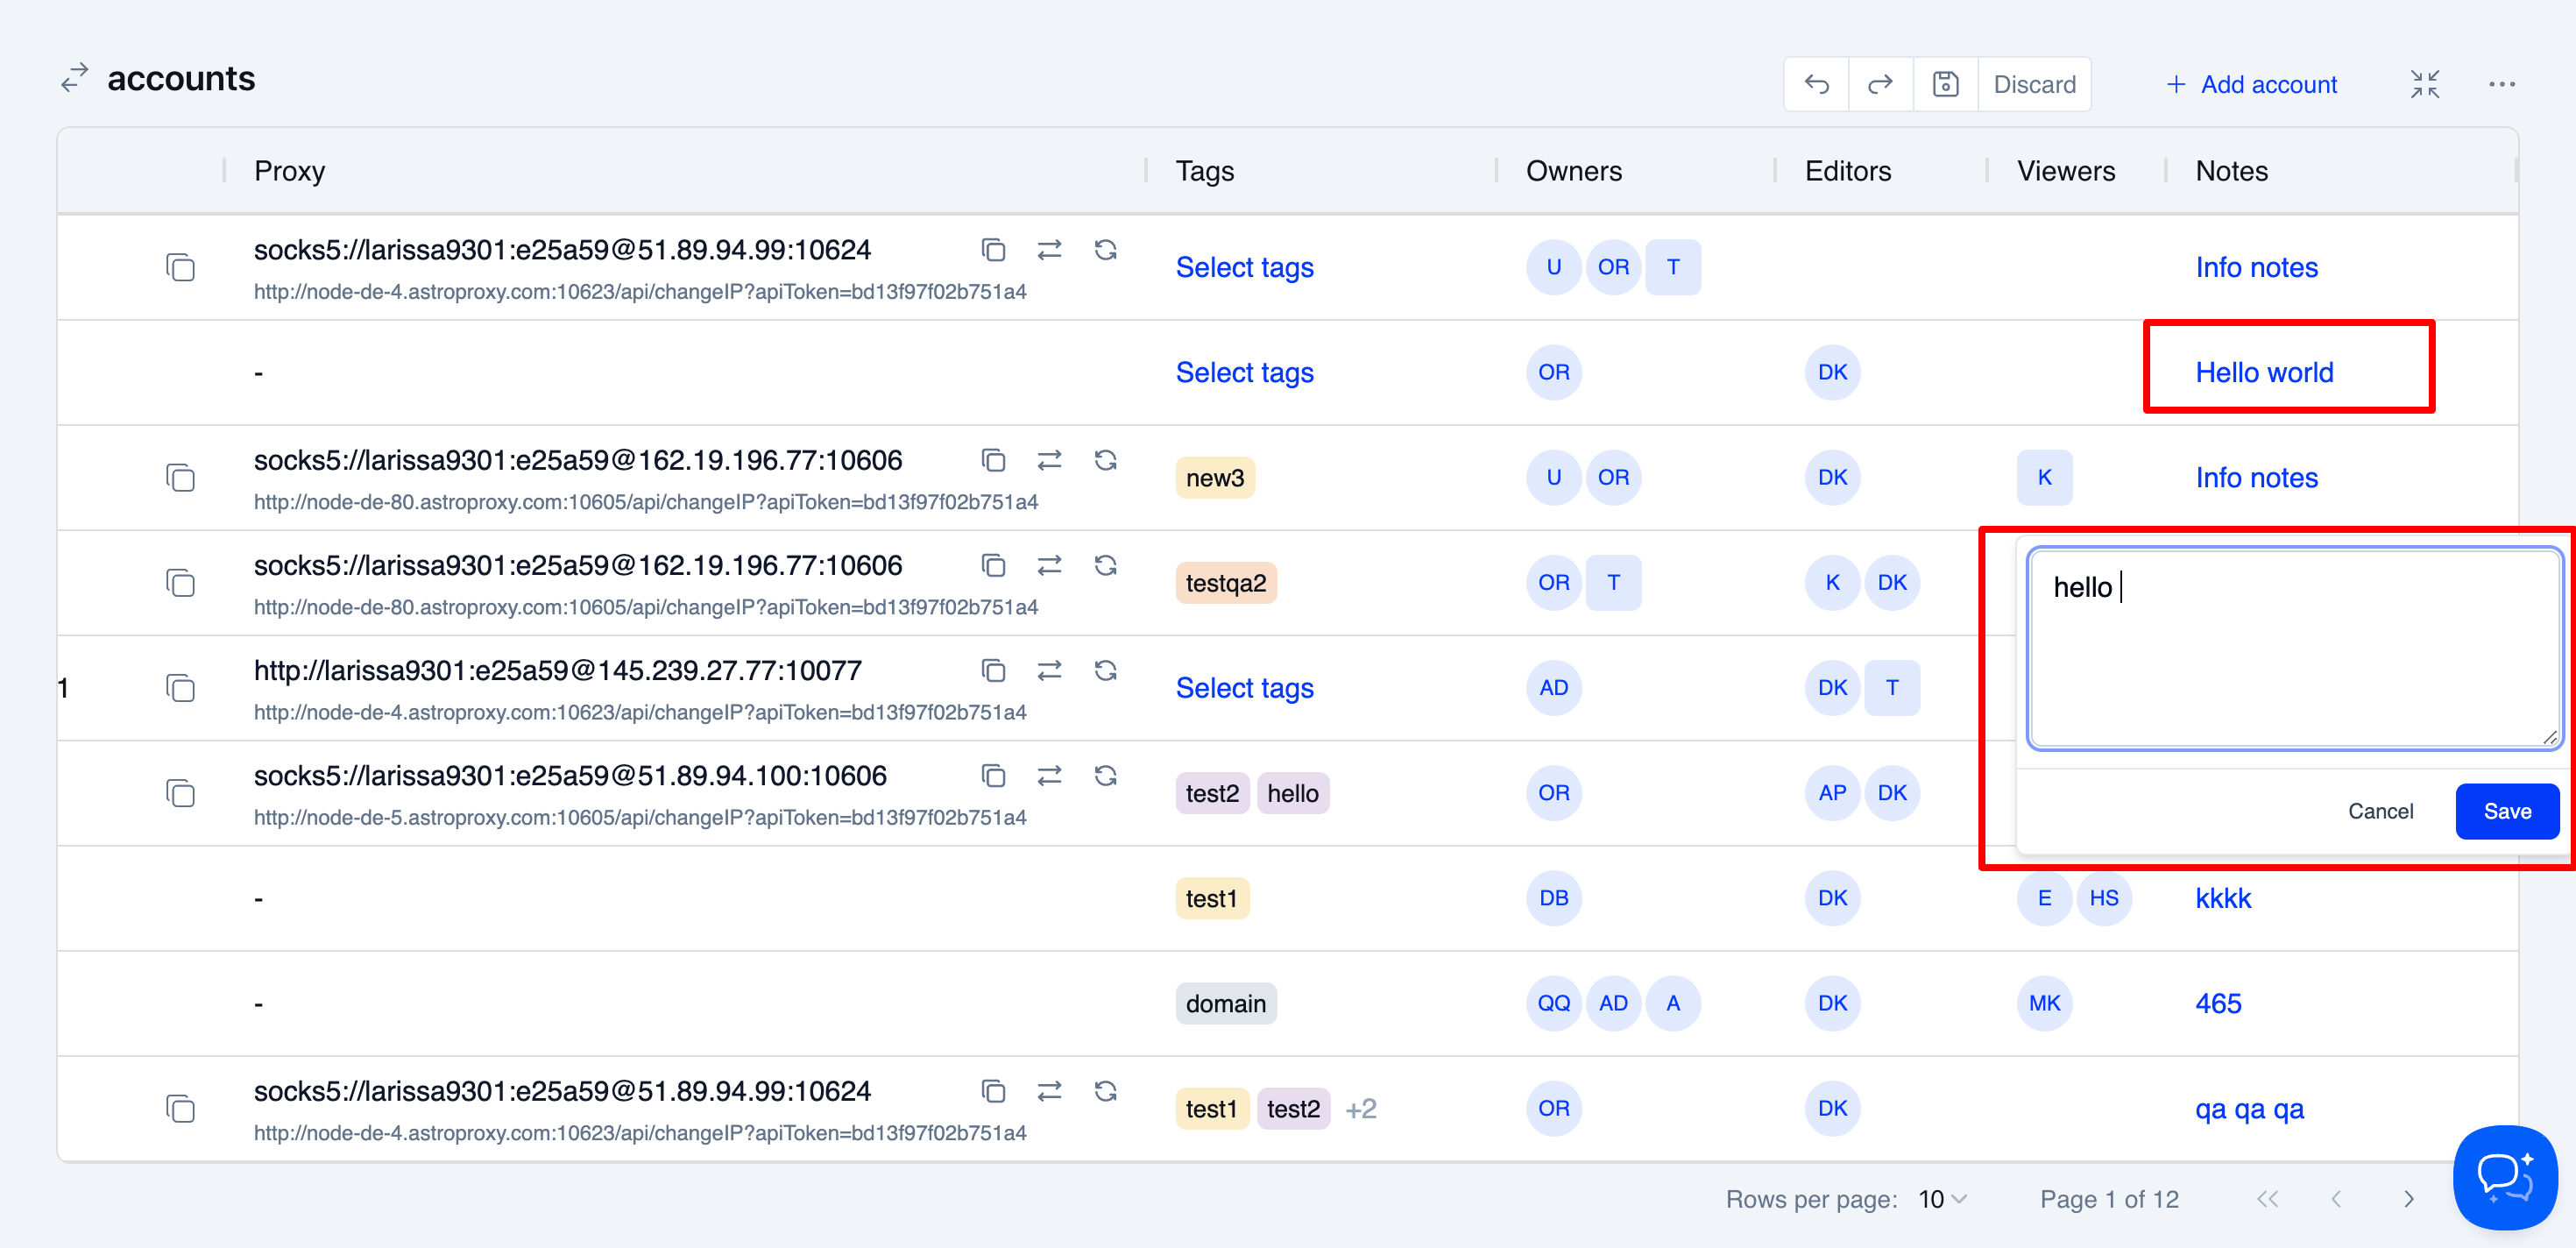
Notes
You can add notes to your accounts to share important details with your team members or to remind yourself of key information that doesn’t fit within tags. This is a great way to provide context, highlight specific instructions, or keep track of important updates related to each account.
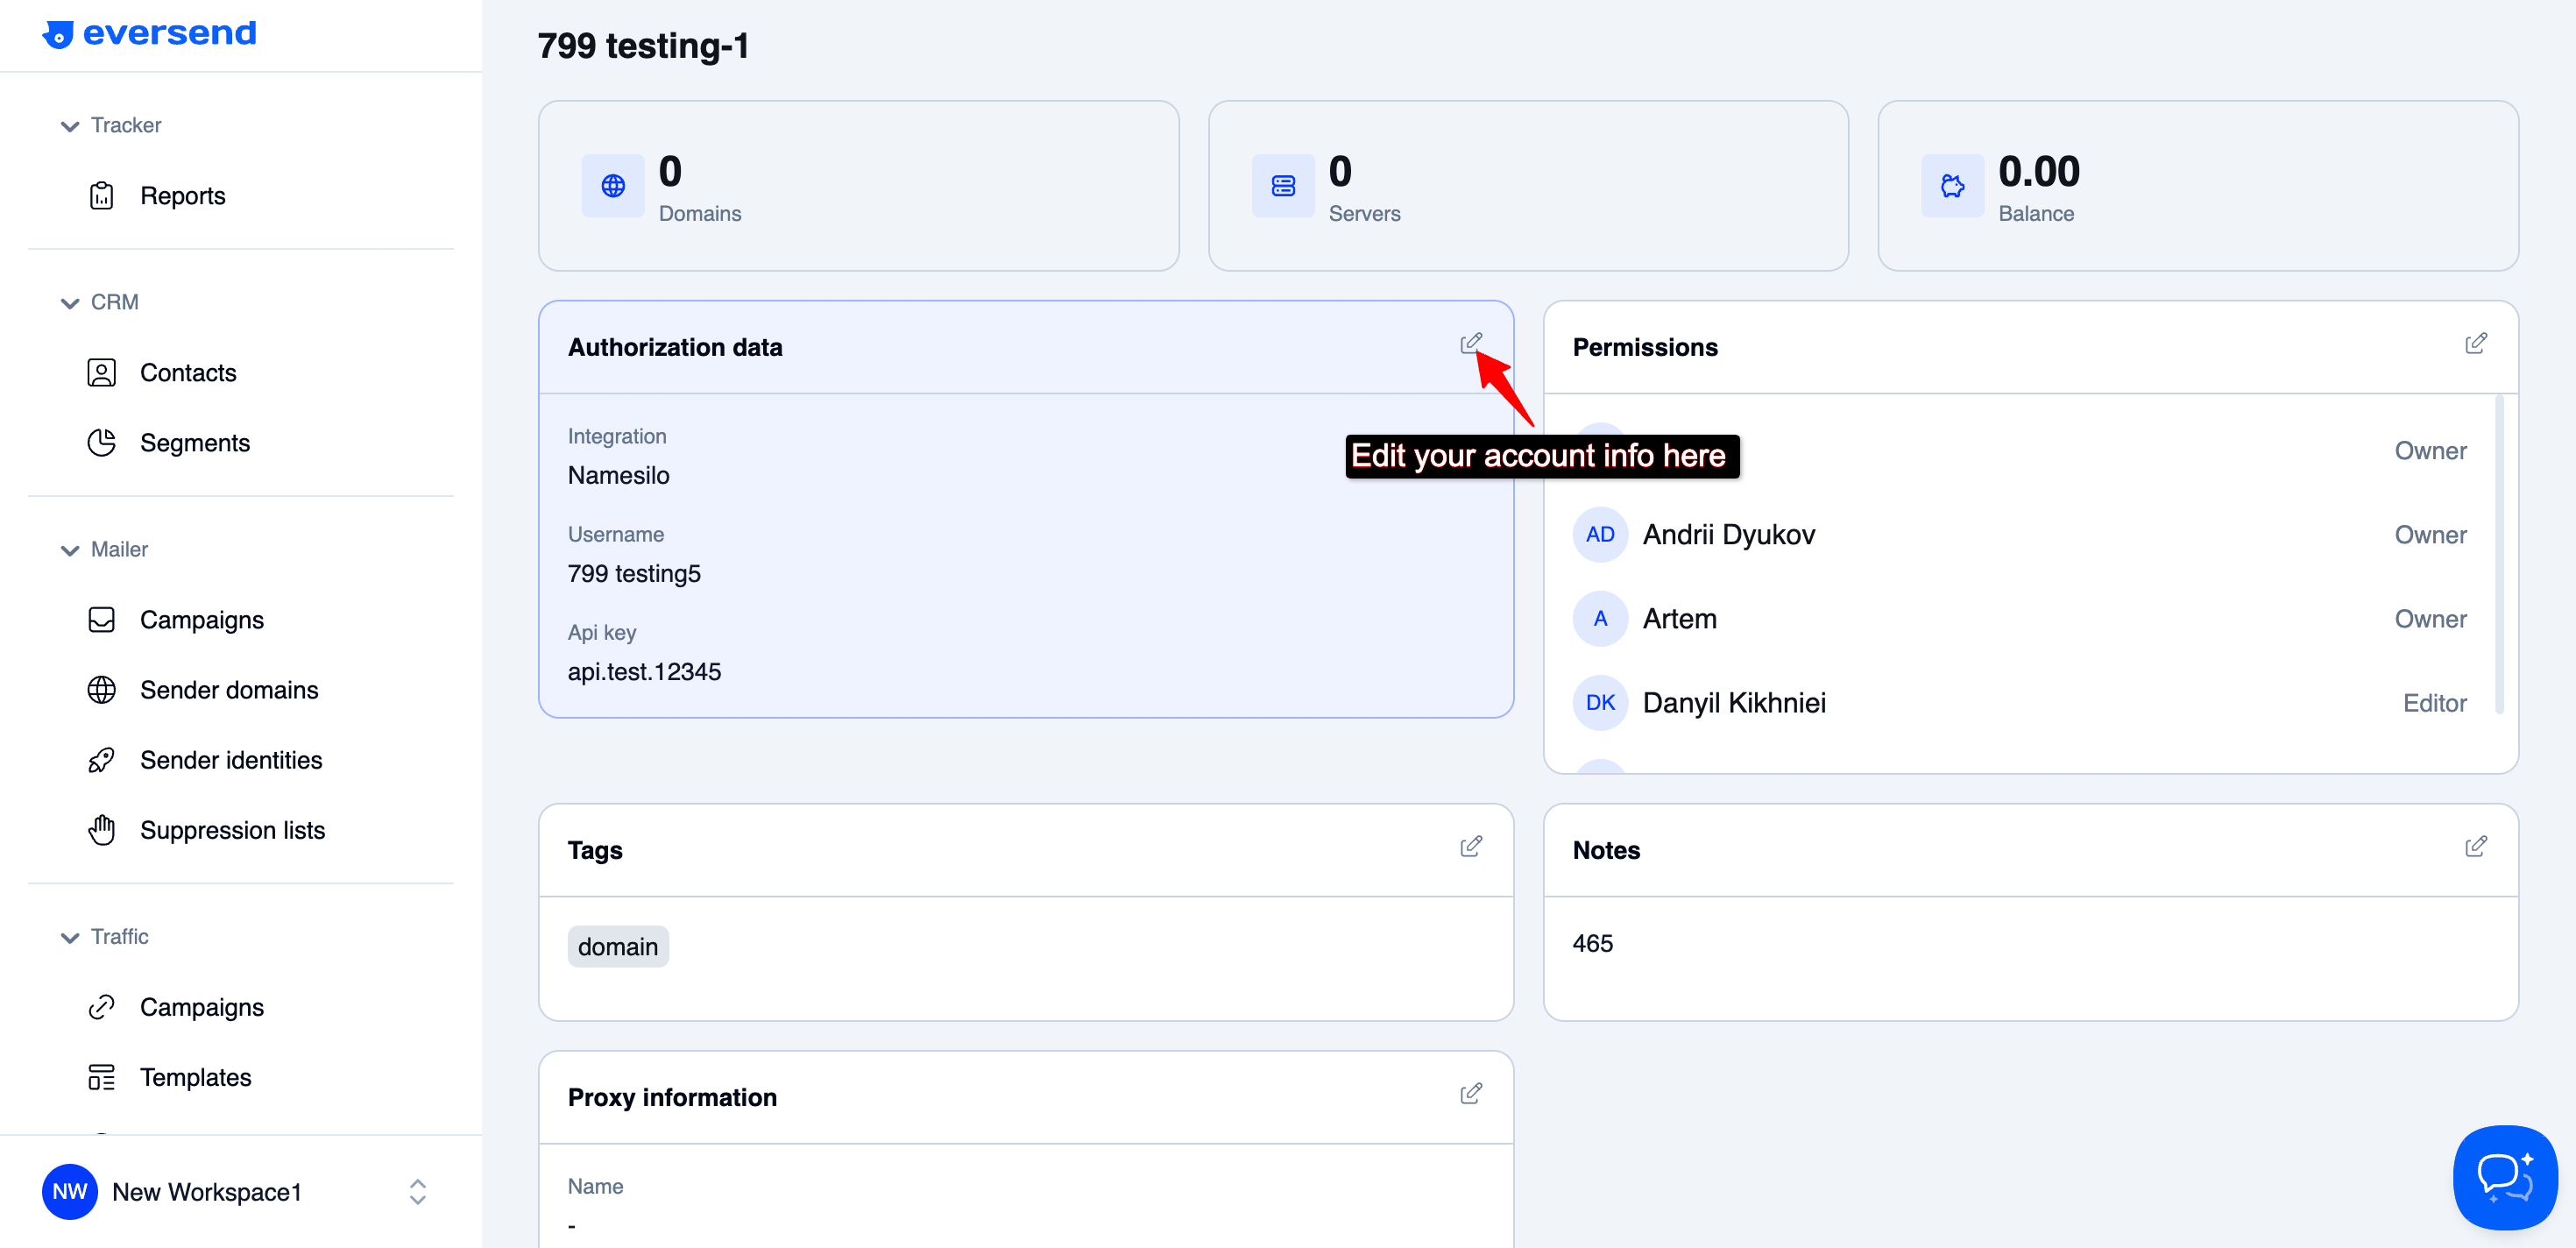
Single Account View
All the actions mentioned above can also be performed individually for each account by opening the Single Account Viewer.
In this view, you can:
- Edit account details
- Add or update a proxy if you haven't done so already
To access the Single Account Viewer, simply hover over the account name and click the button.
Edit authorization data
You can update your Username, API key, Email, or Bearer Token anytime you need to. Simply access the account’s authorization data in the Single Account Viewer and make the necessary changes to keep your account details up to date.
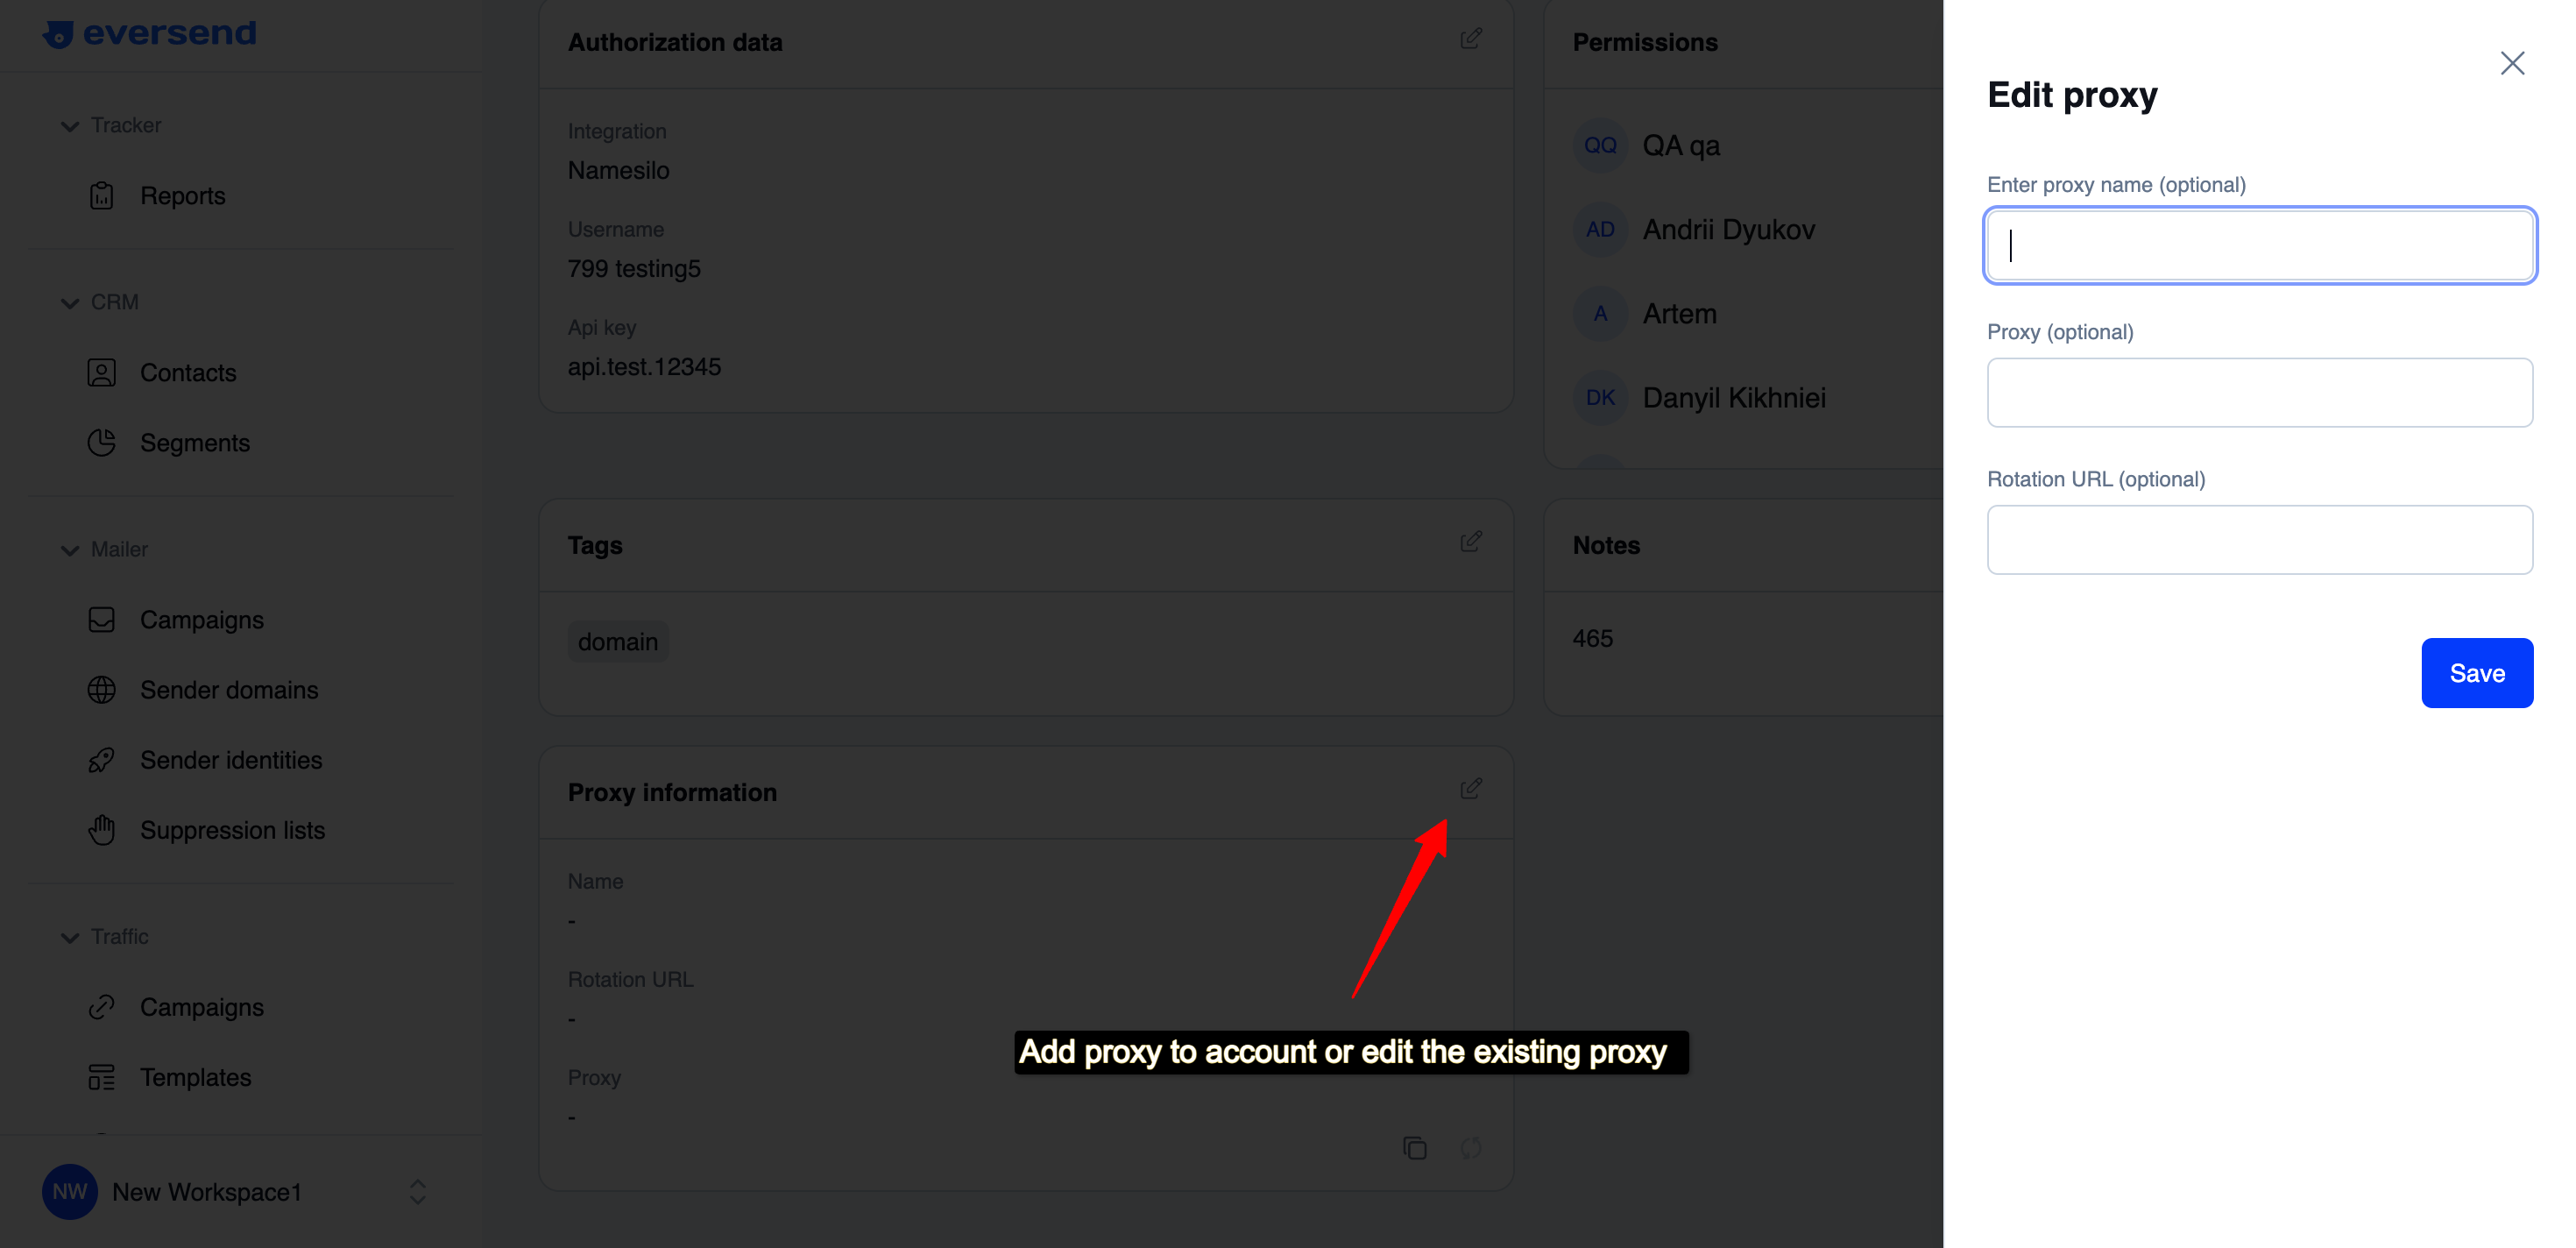
Edit or Add Proxy
- If you didn’t add a proxy when connecting the account, or if you need to change it, you can configure the proxy settings here, including adding rotation URLs if needed.
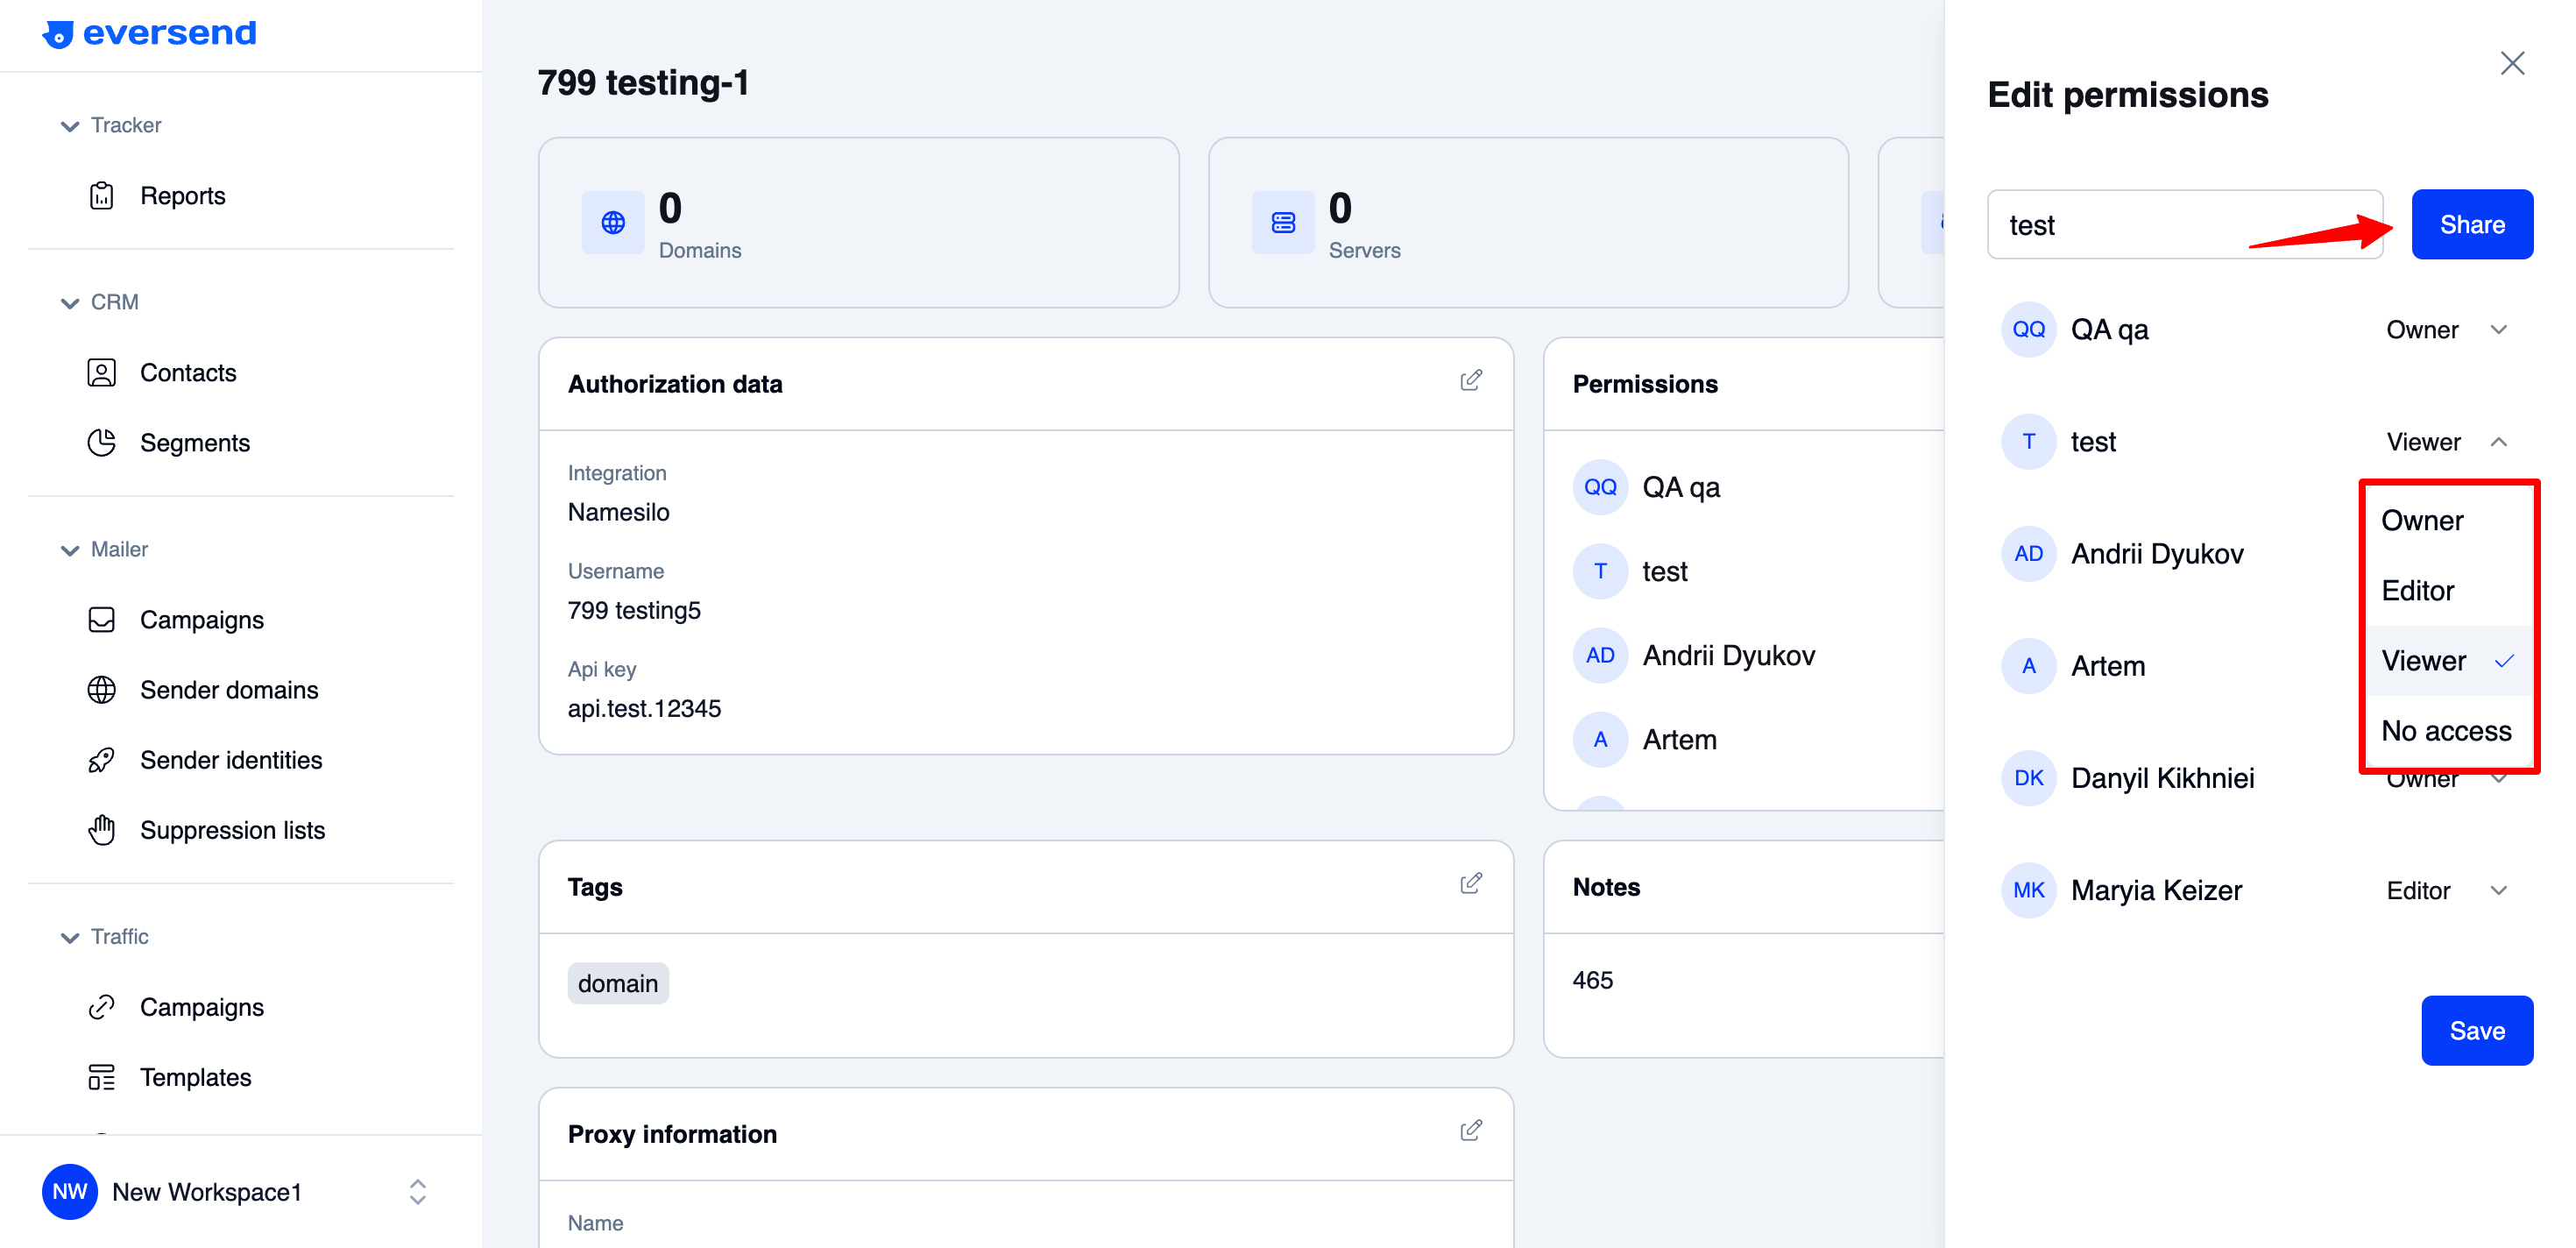
Edit permissions
To manage permissions for an account:
- Enter the member's name, email, or team name and click Share.
- This will initially assign viewing access.
- To modify access, change the role to Owner or Editor as needed.
- To remove access, select No Access.
- Don’t forget to click Save to apply your changes!
Summary
The actions you can perform on multiple accounts in the table can also be done individually in the Single Account Viewer. However, the reverse isn’t true—some actions available in the Single Account Viewer cannot be done from the table.
The Single Account Viewer provides a more detailed overview of each account, allowing for more granular control and deeper insights into account data.
Note: Viewers can see all account information, including sensitive data like API keys.
P.S. Server Provider Accounts
In addition to the authorization data used to connect your server provider account, Eversend also stores your SSH key and SSH key ID for server management. You can access and copy these details in the Single Account Viewer if needed for adjustments or manual server management outside of Eversend.